Autosuggest, Google Analytics, and GTM
If you are using Google Analytics and the ElasticPress Autosuggest feature, you can track users’ engagement with your website typeahead search. This article covers how you can set it up using Google Tag Manager and is fairly based on this post from Analytics Mania and Google Support Articles.
These are the steps you will need to go through:
- Enable Google Analytics events (WP Admin)
- Create Variables (GTM)
- Event Tags (GTM)
- Custom Event Parameters/Dimensions (GA)
- Events Report (GA)
- (Optional) Explorations (GA)
Please note that these instructions apply to ElasticPress 5.1.4 or newer.
1. Enable Google Analytics events (WP Admin)
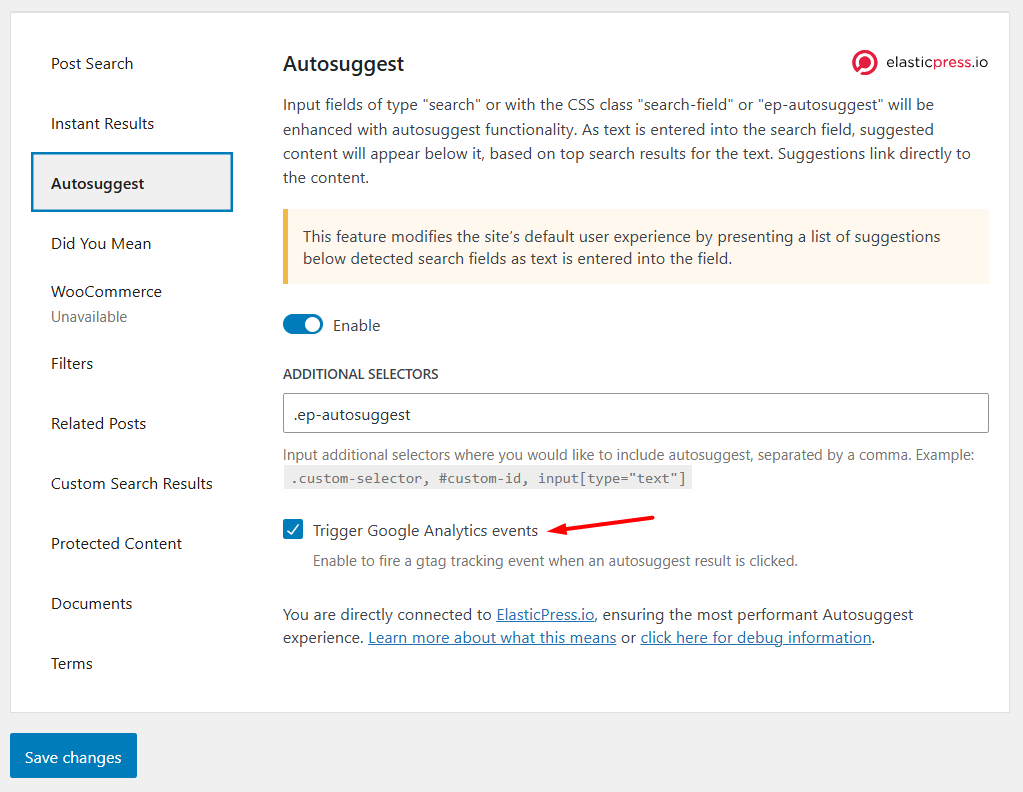
The very first step to start tracking Autosuggest usage on Google Analytics is to enable its option in the WordPress dashboard. Log into your WordPress admin panel, then go to ElasticPress > Features, and click on Autosuggest.
In the Autosuggest box, check the Trigger Google Analytics events option and click on Save changes.
Next, it is time to configure Google Tag Manager, so the information can go from your website, through GTM, and finally reach Google Analytics. For this, you’ll need to perform two steps in GTM: create 2 variables and add the event tag.
2. Create Variables (GTM)
Whenever a user clicks on an Autosuggest item, ElasticPress sends two pieces of information to Google Analytics, the search term and the URL clicked. In this step, you’ll set those two parameters as GTM variables, so they can be sent to Google Analytics when the custom event happens.
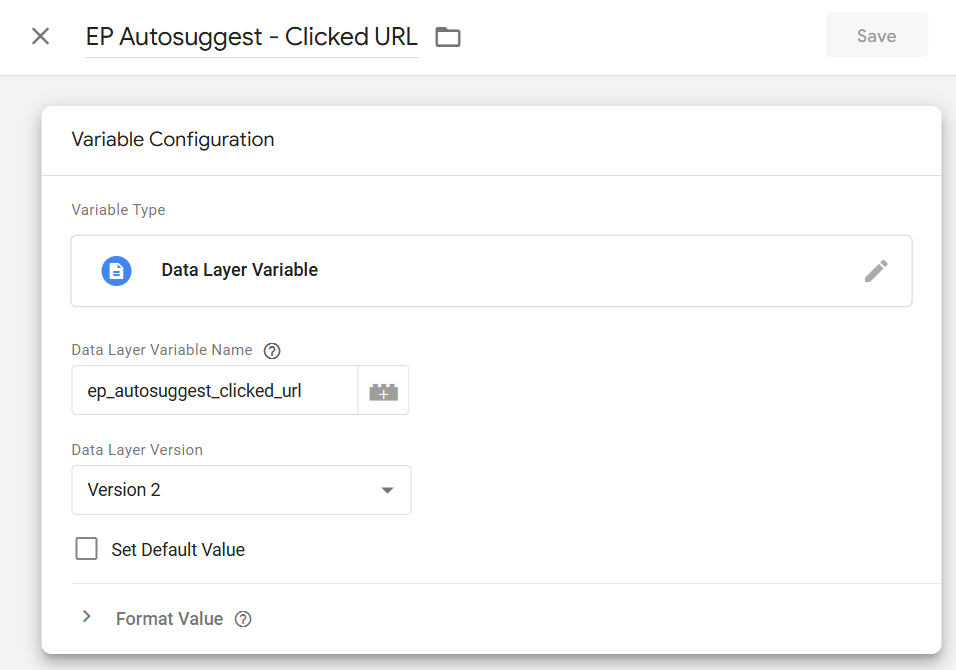
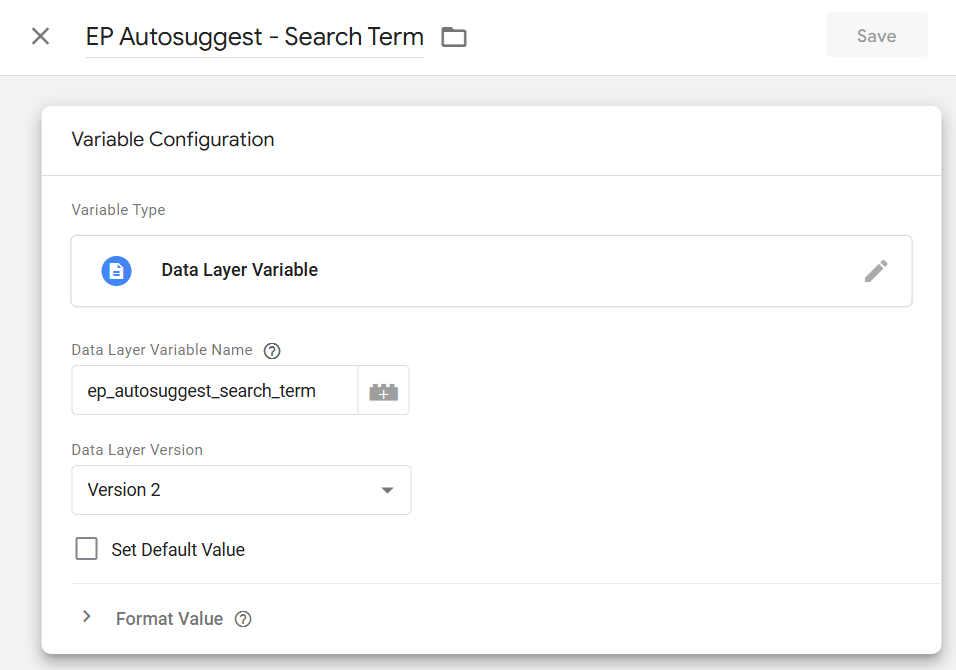
In GTM, click on the Variables menu item on the left. In the User-Defined Variables box, click on New. You’ll have to perform this action once per variable with this information:
- Title: EP Autosuggest – Clicked URL
Variable Type: Data Layer Variable
Data Layer Variable Name: ep_autosuggest_clicked_url - Title: EP Autosuggest – Search Term
Variable Type: Data Layer Variable
Data Layer Variable Name: ep_autosuggest_search_term

3. Event Tags (GTM)
Now it is time to send those two variables to Google Analytics using a GTM Event Tag. On the left side of your screen, click on Tags, then New.
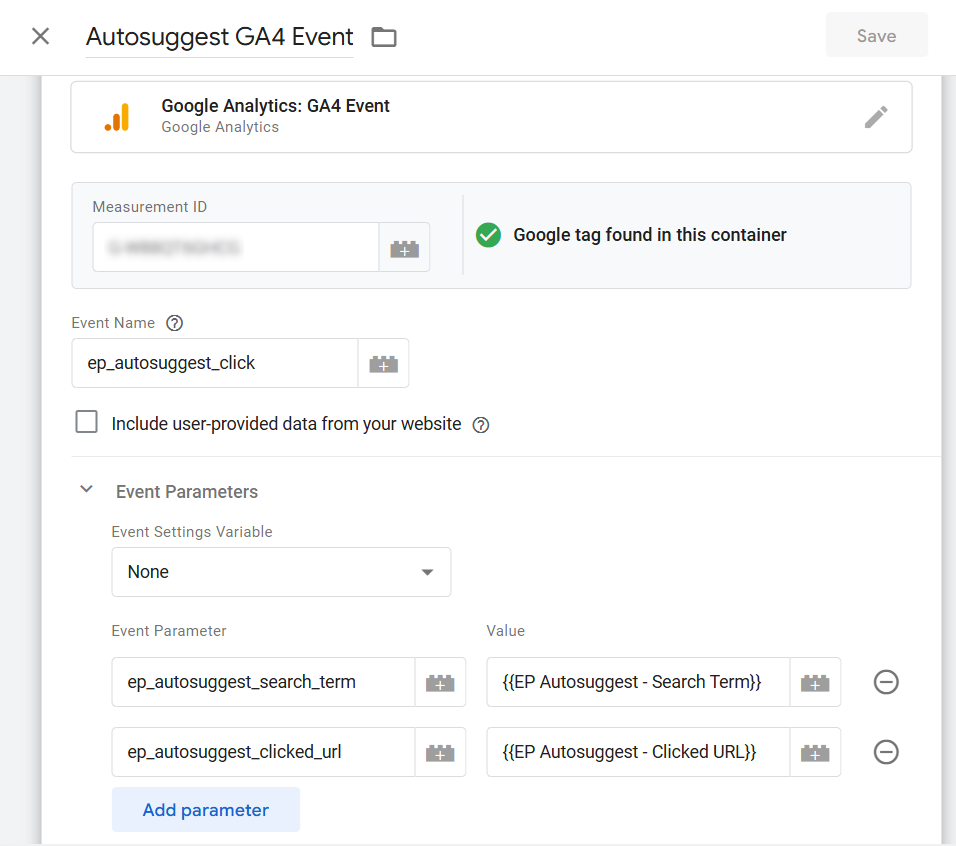
Name it Autosuggest GA4 Event. For the type, select Google Analytics: GA4 Event. In the Measurement ID field, you need to set your Google Tag ID. Depending on how you set things in GTM, this can be already a variable. Just make sure this matches the Tag ID in your Google Tag.
In the Event Name field, type ep_autosuggest_click, and add those 2 parameters in the Event Parameters section, by clicking on Add Parameter:
- Event Parameter: ep_autosuggest_search_term
Value: {{EP Autosuggest – Search Term}} - Event Parameter: ep_autosuggest_clicked_url
Value: {{EP Autosuggest – Clicked URL}}
You can also set values by clicking the plus icon and selecting the related variable we created in the previous step.
IMPORTANT: Do not forget to save everything and publish your new version of GTM!
Although it can take you some time to have everything available on the Google Analytics side, at this point, you should be able to see the custom event being displayed in Realtime reports.
Go to Reports > Realtime Overview. You should see any tests you performed already in the Event count by Event name box.
Next, you need to tell Google Analytics to acknowledge those additional parameters we are sending.
4. Custom Event Parameters/Dimensions (GA)
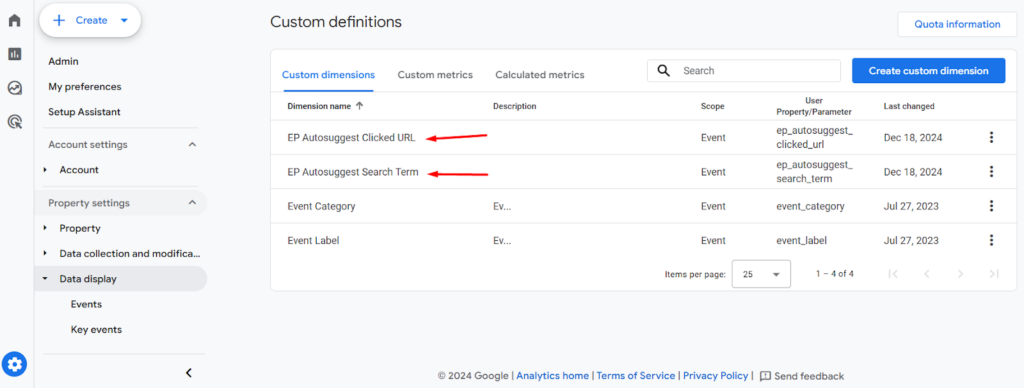
On the left side, click on Admin, open Property Settings > Data Display, and click on Custom definitions.
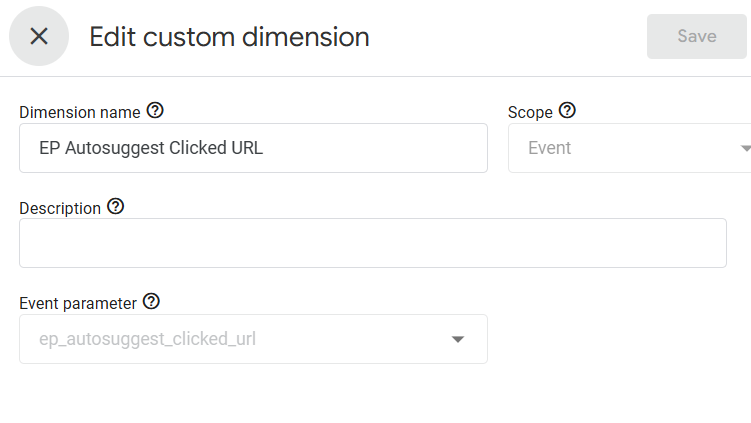
Next, click on Create custom dimension once per variable with the following values:
- Dimension name: EP Autosuggest Clicked URL
Event parameter: ep_autosuggest_clicked_url - Dimension name: EP Autosuggest Search Term
Event parameter: ep_autosuggest_search_term
5. Events Report (GA)
If you only want to measure how many clicks you have on Autosuggest items, the information is available in the Events Report. Click on Reports on the left menu, and under Life Cycle > Engagement, click on Events. The ep_autosuggest_search_term event should be in this list.

6. Explorations (GA)
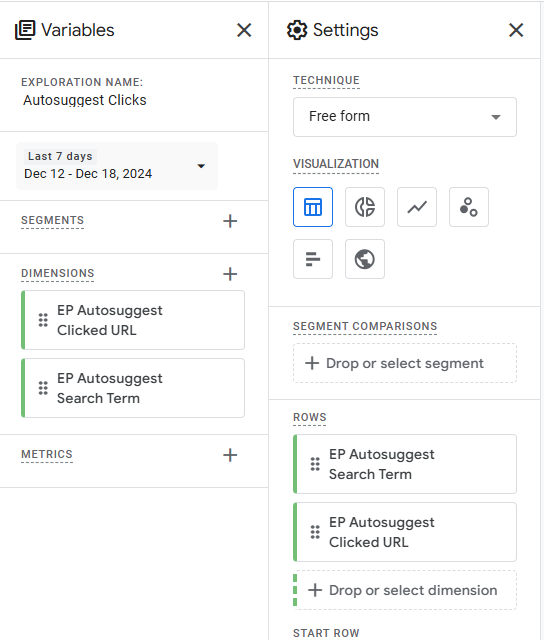
If you want more detailed information on search terms and clicked search results, you can create a custom Exploration.
Starting from the Blank template, add your newly created dimensions, then arrange rows and columns as they best suit your needs.
