How to Upgrade Your ElasticPress.io Plan
As your website grows, upgrading your ElasticPress.io plan becomes crucial to ensure your plan can handle the increasing requirements. This guide will walk you through the process of upgrading your plan.
Steps to Upgrade Your ElasticPress.io Plan:
1. Login to your ElasticPress.io Account: https://www.elasticpress.io/my-account/
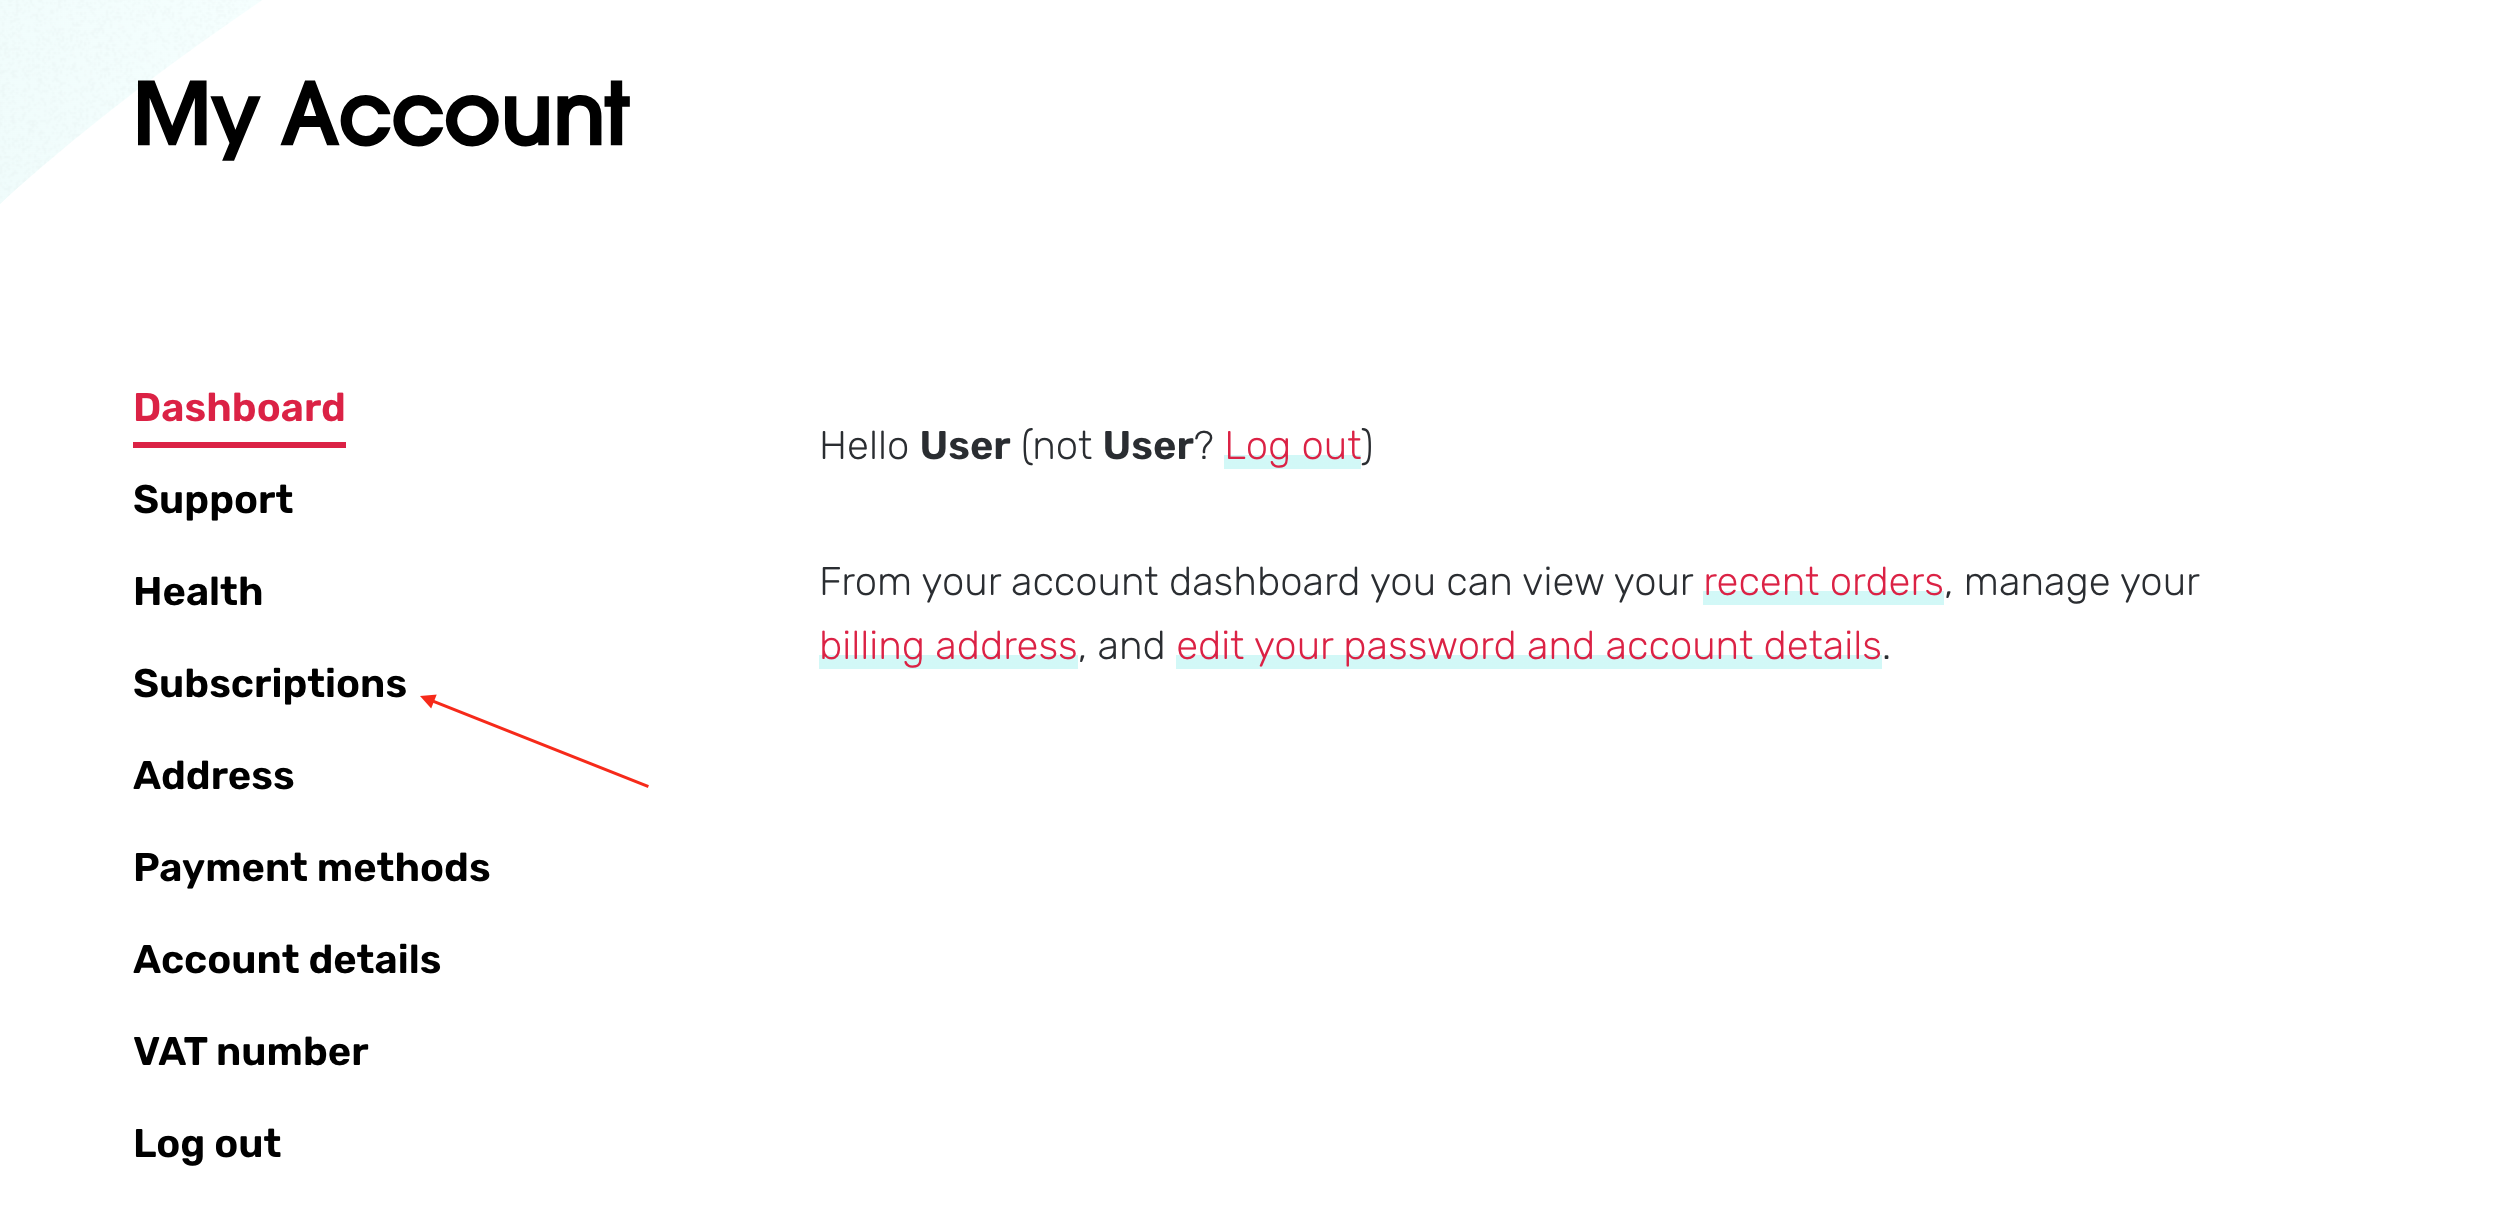
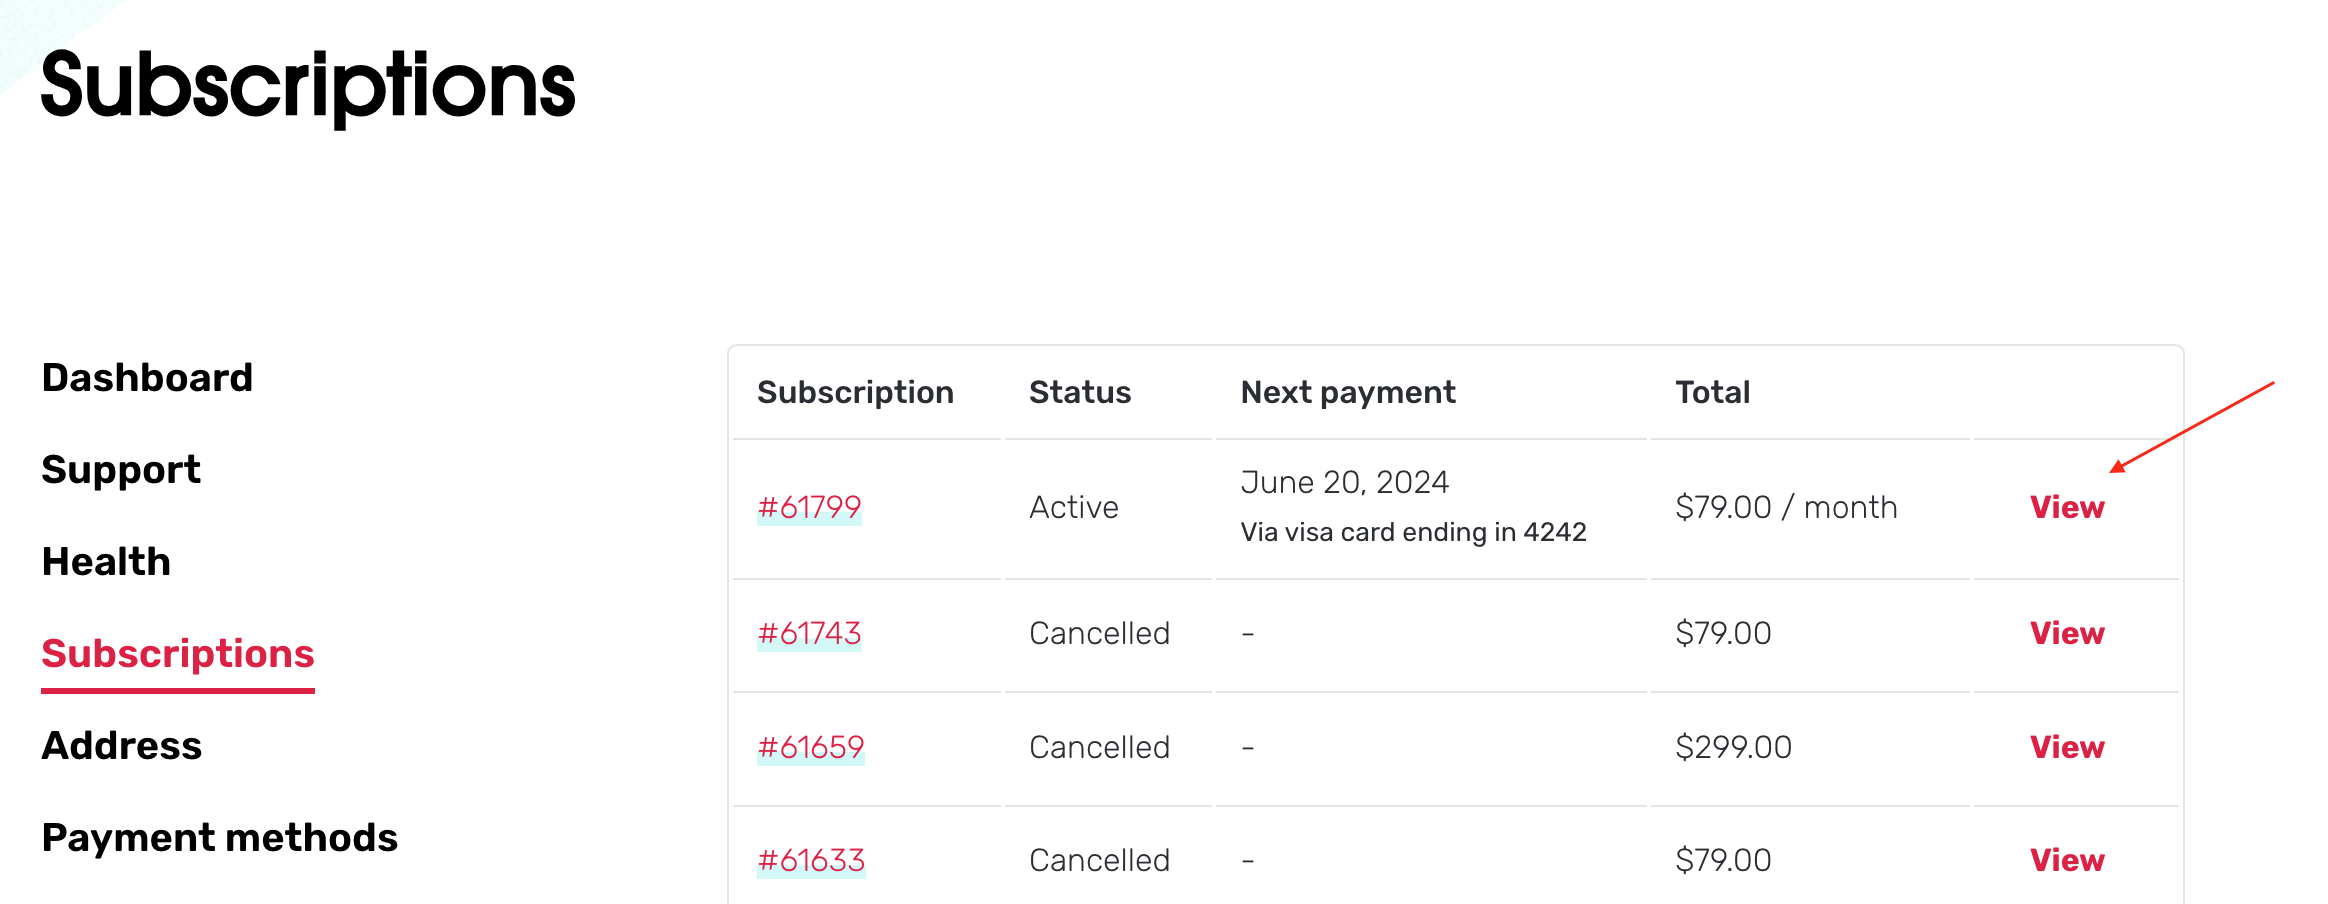
2. Once logged in, navigate to “Subscription” from the left-hand menu. If you have multiple subscriptions, you will be prompted to select the specific one you wish to update. Identify and choose the appropriate subscription by clicking on “View“
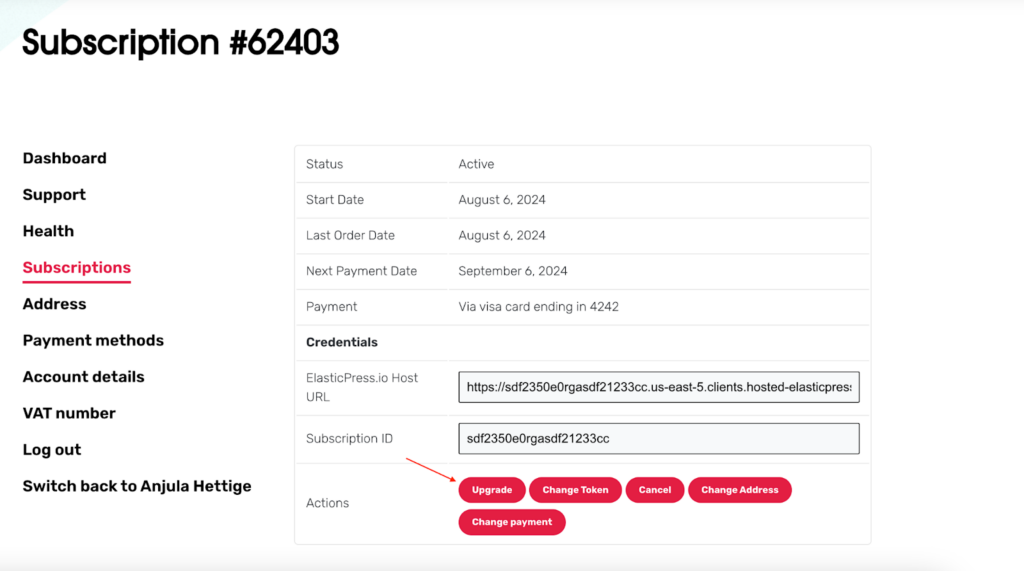
3. On your subscription page, select the “Upgrade” option from the Actions section.
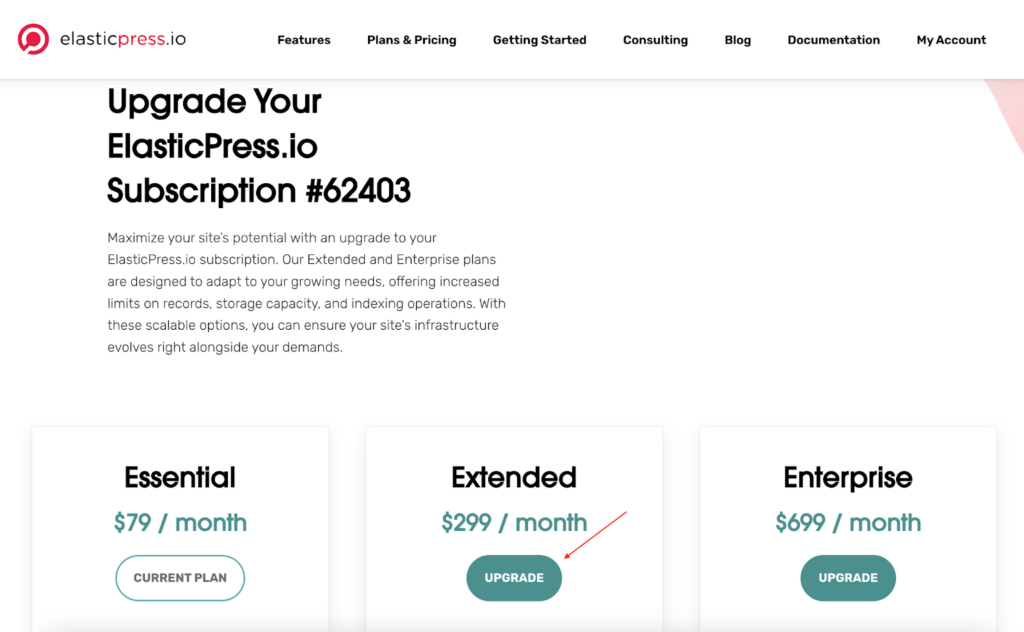
4. Review and Select a New Plan: You will be taken to a page that displays your current plan and the available upgrade options. Review the plans, choose the one that best meets your needs, and click the “Upgrade” button.
If you want to compare the features and limits of each plan, visit the Plans & Pricing page for a detailed overview.
5. Complete the Upgrade Process: Follow the instructions provided in the pop-up window after clicking “Upgrade” to finalize your plan upgrade.
If you run into any issues or have questions before upgrading, click the Help button located at the bottom corner of your screen to open a support ticket.